BREWSTER HUT HIKE NEW ZEALAND – All You Need to Know
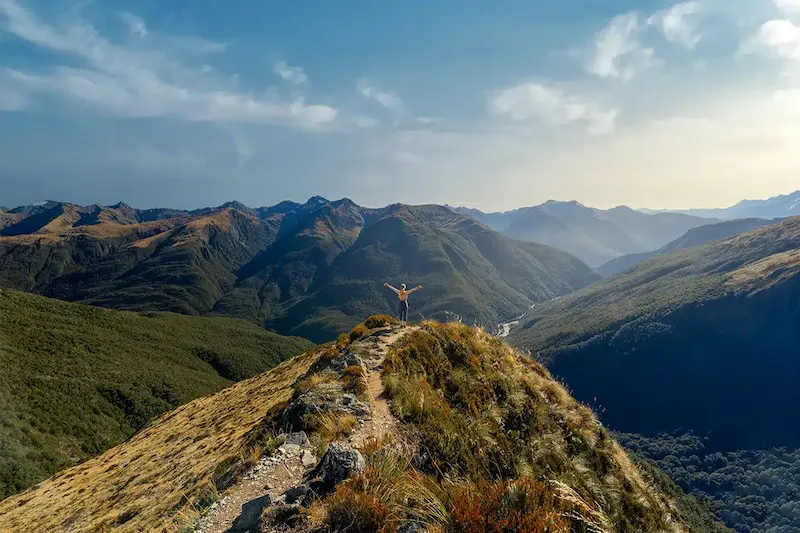
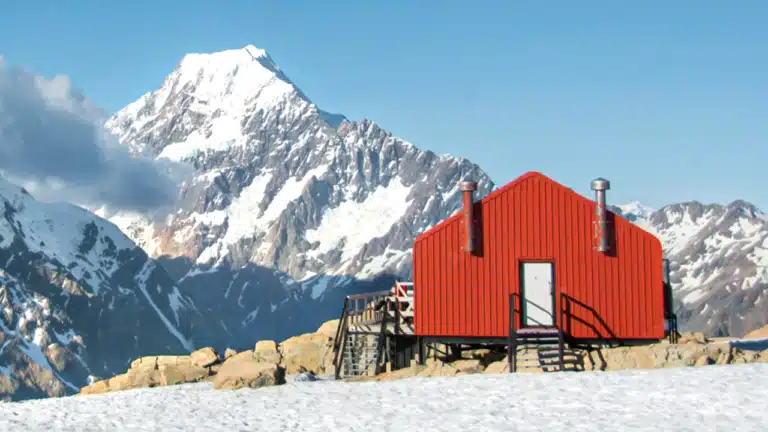
Brewster Hut hike is a brew-tal hike in Mount Aspiring National Park. This beautiful but very steep track through native beech forest brings you to breathtaking mountain views once you’re at the summit. Despite the short 2.8 kilometers one way, you will gain almost 1000 meters of incline along the Brewster Hut Track. As you can imagine, hiking Brewster Hut is a grueling uphill climb. But you will be rewarded with an incredible view of Brewster Glacier, the Southern Alps and the lovely red backcountry hut.
You can either do the Brewster Hut track as a day hike or stay overnight in the Brewster Hut. If you have the time, then staying overnight is a must-do as you can then easily extend your hike to one of the most accessible glaciers in New Zealand, Brewster Glacier. Grab your hiking poles, lace up your hiking shoes and get ready for this epic hike in Mount Aspiring National Park!
How to get to Brewster Hut Trailhead
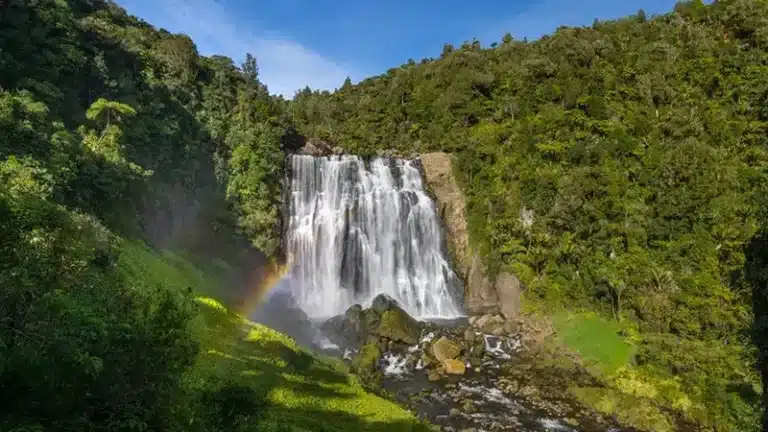
Brewster Hut trailhead is located in Mt Aspiring National Park at the same location where you can visit the Fantail Falls. It is an 85-kilometre drive north over State Highway 6 from Wanaka which will take you about 70 minutes. Along the way, you will pass Haast Pass Lookout and the Blue Pools which is a nice short stop (and eventually warming up) for the Brewster Hut hike.
Have you already booked your accommodation to hike Brewster Hut?
Check the map below for availability and prices or visit this page. Wanaka is the best place to stay to visit Brewster Hut Hike. Secure your accommodation ahead of time as the demand is much higher than the availability.
Brewster Hut hike key facts
Before we dive into the details about Brewster Hut track, let’s first have a look at the key facts of the trail so you can decide if this is a hike for you!
Brewster Hut hike distance and duration: The return distance to Brewster Hut is 5.9 kilometers and will take you anywhere between 5 – 7 hours to complete. This really depends on your fitness level and how fast you can gain elevation in the forest. Average to fit hikers will take about 1,5 – 2 hours to climb in the forest through tree roots and another 40 minutes to reach the hut.
Brewster Hut hike difficulty and incline: In one word, Brewster Track is brew-tal! This is definitely not a hike for untrained people. First, there is the Haast River crossing involved, and after that, it’s straight up through the forest without a proper flat part until you reach the hut. Therefore I would highly suggest bringing your hiking poles for extra support. The total elevation gain of Brewster Hut hike is 965 meters measured from the car park. But because you gain this elevation over such a short distance, it literally feels as if you’re vertically climbing up a mountain. Basically, the first 60% of the track is in the forest and consists of tree roots with high steps and rocks. Then the last 40% toward the hut is along an exposed ridgeline with beautiful mountain views.

Best time to hike Brewster Hut
The best time to hike the Brewster Hut is during the late spring, summer, and early autumn months. This generally corresponds to the New Zealand hiking season, which runs from September to April. The drier weather during the summer months tends to result in clearer skies and better visibility, offering more opportunities to witness breathtaking views of the Southern Alps and surrounding landscapes from Brewster Hut.
Regarding the best time of the day to hike Brewster Hut Track we always recommend starting early. This will give you the highest chance of clear skies and enough time to relax at the summit before making your way back. Whenever you plan to hike Brewster Hut, make sure to check the weather forecast and be prepared with several layers of clothing because the weather can change quickly in the mountains.
In case you have alpine experience and you have the right gear such as crampons, you might be able to hike Brewster Hut on a sunny winter day as well. However, this is not directly recommended by the DOC because of the avalanche terrain. Avalanches are most common in winter and spring but can occur in any season. So if you’re planning to hike Brewster Hut trail in winter, then make sure to contact the Tititea / Mount Aspiring National Park Visitor Centre for advice on conditions before you go.

Brewster Hut hike trail description
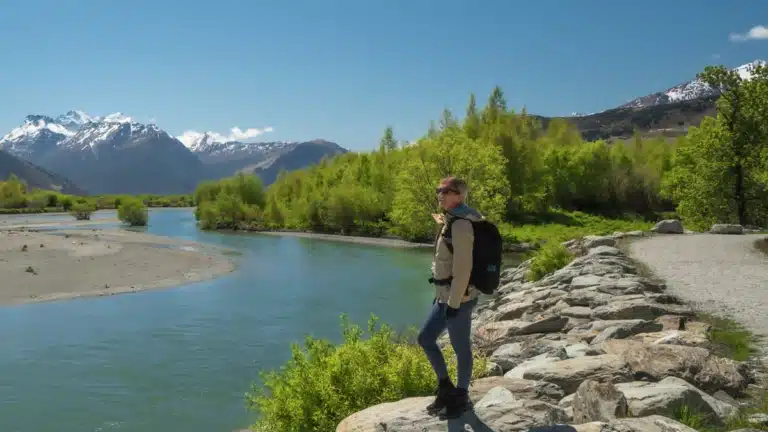
The beginning of Brewster Track crosses the unbridged Haast River, so this means taking your shoes off and getting a nice ice bath for the feet, or plowing through with your hiking boots on. If the river is at knee level with a fast stream, you might want to think twice. Either use your hiking poles for extra support or abort the mission of hiking Brewster Hut. Safety first, always.

After getting our feet nice and cold before the start of the hike, we were ready for the long push in the forest. It’s a steady steep hike for the first hour, without any flat sections. Don’t push too hard at the beginning, but rather go slow and steady to save your energy for the complete hike.

There are no mountain views along the way up through the forest which might feel a bit monotonous and boring. On the other hand, you can keep all your focus on your foot placement which is necessary with all the tree roots and big steps. There are a few sections where you have to navigate through and underneath a fallen tree trunk, so watch your head!


Other parts where you have to be cautious are the boulders which might be a bit loose after heavy rainfall. Always check your foot placement before you push yourself up.

The good thing about the forest is that on a sunny day, there is a lot of shade. It also means there is not much wind so it can become hot and sometimes even humid.

When you’re close to the treeline you will notice that the bush starts to thin out. This means that you will almost be treated to the first glimpses of stunning mountain views! This part is also a bit funny because you’re basically walking through a dry creek bed. The grass is super high and the trail can be very slippery here after rainfall.


The last leg to Brewster Hut
Once above the treeline, the final leg to Brewster Hut starts. From here on the views will only get better! You will now make your way further up on the beautiful ridgeline with panoramic views. If you look behind you, you can see the Haast River where you started with a beautiful backdrop of the mountains.

In front you can see the views over Mount Armstrong, Brewster Glacier and Mount Brewster will get more and more visible. Once you make it further up the ridgeline you will have a stunning view on Brewster Glacier which you can visit as well after reaching the Brewster Hut.

Extending the trail from Brewster Hut to Brewster Glacier
Once you’ve reached Brewster Hut and depending on if you’re staying overnight or not, you can decide to hike the extra leg to Brewster Glacier. This is one of the most accessible glaciers in New Zealand and so worth it! This will take about 2,5 – 3 hours round trip with 600 meters incline over 6 kilometers return. This part of the trail can be a little tricky to navigate as the track is not well marked and involves some scrambling. Keep an eye out for the cairns that have been placed along the way as a point of reference.

FAQ Brewster Hut
How high is Brewster Hut located?
Brewster Hut is nestled at 1450 meters above sea level. Perched approximately one kilometer above the Haast Highway, Brewster Hut rises 300 meters above the bush line.
The surrounding mountains of Brewster Hut are Mount Armstrong which is 2174 metres above sea level and Mount Brewster at 2516 metres in height. You can hike from Brewster Hut to the bottom of Brewster Glacier which is at 1650 metres above sea level.

Can you tent at Brewster Hut?
Yes, you can. However, you need to have experience pitching a tent amidst the boulders near the summit. This requires expertise in setting up a tent without the presence of soil, as most of the area consists solely of boulders. As you ascend the ridge, you’ll come across some tarns and occasional nearly flat areas which are good spots to pitch a tent at Brewster Hut. This would be great alternatives if you didn’t have the chance to book your hut tickets in time.
What is the elevation gain of Brewster Hut?
Brewster Hut Track has a total elevation gain of 965 meters over 2,8 kilometers one way.
The elevation gain from Brewster Hut to Mount Armstrong summit is 715 meters and is 3,8 kilometers return. And Brewster Hut to the Brewster Glacier lakes is a 600-meter incline over 6 kilometers return.
How much does Brewster Hut cost?
Brewster Hut has 12 bunk beds with mattresses, non-flush toilets, no fireplace, but double-glazed windows and an excellent ventilation system.
The costs for Brewster Hut are:
Adult (18+ years): $30 per night
Youth (11–17 years): $15 per night
Child/Infant: (0–10 years): free
From December 1st to April 30th you need to book Brewster Hut online before you arrive. If you’re planning to go during high season, make sure to make your reservation soon in the season.
How to get around in New Zealand
To experience New Zealand to the fullest and at your own pace, renting a car, campervan or motorhome is the best way. Which one of these options you choose depends on your preference and budget. If you love camping, being outdoors all day and you don’t mind a smaller living space, then renting a camper van is the way to go. It also gives you the freedom to sleep at some of the most beautiful camping spots. The same goes for a motorhome which is bigger than a campervan and fits about 4-6 people. Here’s what you need to know about renting a car, camper van or motorhome in New Zealand.
Car rental in New Zealand
Renting a car in New Zealand is the easiest and cheapest rental vehicle available. It will get you to all the best destinations with ease and gives you the freedom to stop for a break wherever you want. However, you should keep in mind that some roads in New Zealand are gravel or that you have to cross shallow rivers to some destinations in National Parks. Therefore we recommend a mini SUV or SUV model to have enough clearance for this kind of road.
The best place to book your rental car in New Zealand is on Discover Cars where you can compare different car models, prices, companies and terms and conditions. You can also check Rental Cars to compare at which platform you can get the best deal. Make sure to secure the booking of your rental car as soon as possible to have the lowest price possible. Prices go up the closer you get to the pickup date.

Campervan rental in New Zealand
Traveling around in a campervan is one of the most popular ways for a road trip in New Zealand. With a bed, small kitchen and seating area you will have all the (basic) needs on four wheels. A campervan allows you to camp at plenty of beautiful places, sometimes for free, sometimes for a fee. It will give you a true feeling of freedom and connect you with nature.
We recommend booking your campervan with Travellers Autobarn. They have a wide range of Station wagons, 2-berth campervans & 3-5 berth campervans to hire for all budgets. All Travellers Autobarn campervan hires in New Zealand come with free unlimited kilometers, 10% discount to premium campgrounds, 24/7 roadside assistance & long-term rental discounts. Check the availability and prices today to secure your campervan for a New Zealand dream road trip!

More New Zealand travel guides
I hope you enjoyed this complete guide about the Brewster Hut hike in Mount Aspiring National Park. Make sure to put this awesome hike on your New Zealand North Island itinerary!
There are many amazing other things to do and places to visit on the South Island of New Zealand. So if you’re looking for more inspiration and ideas, head over to our other New Zealand travel guides!
Mount Aspiring National Park
Rob Roy Glacier track – The Complete Guide
Isthmus Peak hike – The Complete Guide
Roy’s Peak hike – The Complete Guide
Best things to do in Wanaka – The Ultimate Guide
Mount Cook National Park
12 best Mt Cook walks – The Ultimate Guide
Hooker Valley track – The Complete Guide
Sealy Tarns track – The Complete Guide
Tasman Glacier viewpoint – The Complete Guide
Mueller Hut Track – All You Need to Know
Lake Tekapo
20 best things to do in Lake Tekapo
Franz Josef Glacier Country
Best Franz Josef heli hike tours – All You Need to Know
15 best walks in Franz Josef – The Ultimate Guide
Lake Matheson walk – The Complete Guide
Franz Josef Glacier walk – The Complete Guide
Roberts Point Track – All You Need to Know
Fox Glacier Walk & Walking on Fox Glacier Guide
Hokitika Gorge walk – The Complete Guide
Queenstown
30 best things to do in Queenstown – The Ultimate Guide
16 best hikes in Queenstown – The Ultimate Guide
10 best wine tours in Queenstown – The Complete Guide
12 best helicopter tours in Queenstown – The Complete Guide
Queenstown Hill walk – The Complete Guide
Ben Lomond track – The Complete Guide
Moke Lake loop track & viewpoint – The Complete Guide
Bobs Cove nature walk – The Complete Guide
Fiordland National Park
20 best things to do in Milford Sound – The Complete Guide
Milford Sound Cruise – The Complete Guide
Lake Marian track – The Complete Guide
Gertrude Saddle track – The Complete Guide
Mirror Lakes New Zealand – The Complete Guide
Key Summit track – The Complete Guide
Glenorchy
20 best things to do in Glenorchy – The Ultimate Guide
Glenorchy walkway & lagoon track – The Complete Guide
Earnslaw Burn glacier valley and waterfalls – The Complete Guide

This post may contain affiliate links
We hope this guide will help you plan your travels! If you consider booking your accommodation, tours or rental car via our affiliate links, you support this blog because we earn a small commission at no additional cost to you!