
HOW TO MAKE A TIME LAPSE VIDEO
Making a time lapse is an interesting technique to capture a scene or object that has a slow state of change, which you can turn into a video playing back in high speed. However, shooting the time lapse with your camera is only half of the process. Because once you have all of your photos, you’ll need special software to merge them together into a time lapse video. That makes it a good reason to step up your photography skills and learn more about videography and the video editing process!
In this blog post you will learn how to make a time lapse video and find the answers on the following questions:
– Meaning of time lapse
– What do you need to make a time lapse video
– How to prepare to make a time lapse video
– Time lapse photography ideas
– Best camera settings & How to shoot the time lapse
– Time lapse settings suggestions
Meaning of time lapse
A time lapse is a video that’s made up of a sequence of photos to reflect the passage of time. The passing time could be minutes, hours, days or even weeks! In other words, it allows us to see the progress faster without having to wait along the actual time.
How many photos you need to make your time lapse video depends on the time you have to make the time lapse photos. For example, if you want to make a time lapse of the sunset, you know you have around 30 minutes in total to make the time lapse photos. You’ll need a minimum of 12 photos per minute to show the speed of the sun setting. But if you want to make a time lapse of a growing plant, then one picture a day, at the same time, is enough to show the process. Also the recording frames per second of the time lapse video that you want to use is important to take into account. Read more about the time lapse video editing process in this blog post.
To calculate how many photos you need to create your time lapse video read further under the heading “How to shoot the time lapse?”
What do you need to make a time lapse
- Camera with the option of interval shooting. There is no best camera to make a time lapse video, just choose one with the time lapse option. Here you will find all the gear and cameras we use;
- Tripod or Gorillapod to attach your camera so it’s fully stable and can’t move;
- Remote control or app on your phone which you can connect to your camera to manage your camera’s shutter button at the interval you prefer;
- ND filters. If you have filters such as a polarizer and ND filters make sure you use them to control exposure and to shoot the best images possible. If you don’t have filters you could underexpose shots by one or two stops and recover the foreground in post-production. But filters will always be the better option because they will allow you to maintain optimal image quality.
How to prepare
- Extra batteries. Make sure all your batteries are charged and you have all of them with you;
- Take a lens cloth with you so you can clean your lens;
- Enough memory card space. It would be a shame if you find out you have too little space available and can’t finish the time lapse;
- Create a plan! If you want to make a time lapse of a sunset or sunrise, make sure to arrive at least an hour before at your location. Check the time of the sunrise or sunset and other possible elements like the moon or tides which may come into play;
- Pick a good and safe spot. Keep in mind that people who don’t pay attention to your tripod might walk in front of the camera. That will ruin your time lapse video, unless you want movement of people in it. Also make sure your tripod is stable on the ground, so that wind or waves can’t bring it out of balance;
- Framing and position are key. When you arrive on time it gives you the possibility to visualize the scene and find the best framing and position. Take a walk around the area, imagine the shot, take a look at the scene and find the best location and composition. Then set up your camera on your tripod and…;
- Do test shots! Don’t start shooting right away. Always do some test shots to ensure you are getting the right framing, composition, exposure and focus;
- Think about yourself. Take enough water and food if you’re going to shoot a time lapse for hours and dress to the forecasted weather conditions.
Always pick a safe spot for your tripod and camera so that wind or waves can’t bring it out of balance
Time lapse video ideas
Of course you can be as creative as you want, but here are some examples for shooting a time lapse video.
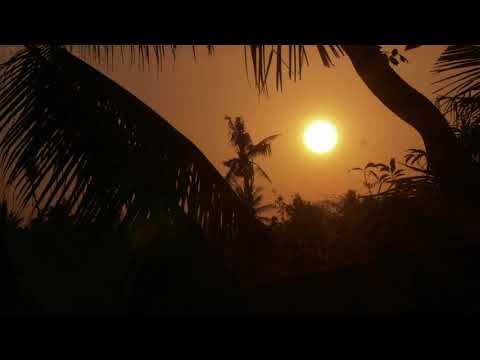
- Sunrise, sunset or from sunrise to sunset;
- Flower blossoming;
- Ice melting;
- Lights of buildings in a big city that turn on after sunset, or switched off after sunrise;
- Stars movement;
- Growth of a plant;
- Floating ice blocks;
- Movements in a busy street;
- Fruit decomposing;
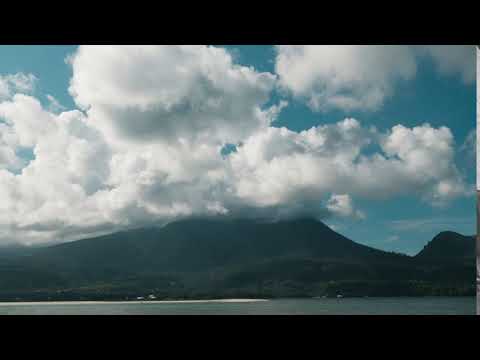
- Clouds movement (example below of cloud time lapse).
Best camera settings & How to shoot the time lapse
- Set your camera on RAW so you have the best quality and you can tweak some little things afterward.
- Shoot manual mode. This will give you better control over your exposure and post-production in combination with the RAW files.
- Focus accurately. It is very important to select the manual mode in both the camera and lens, if applicable. With wide angle lenses you can focus to infinity. In other cases, however, having elements of interest in the first or middle term, you must ensure that this is where the focus will be.
- Avoid flicker. Also known as the unwanted effect that occurs in the time lapse due to slight differences in exposure between shots. If you have a manual lens like our Panasonic 8-18mm F2.8 you’ll not have to worry too much about flicker if you choose to shoot in manual to keep the aperture in the same position. But regardless if you use a manual or AF lens, make sure to focus manual and focus one-third of the distance into the scene behind the foreground. This will provide a large depth-of-field.
- Choose the right lapse. The interval between shots is what will determine the speed of your final time lapse video. The longer the interval, the faster the movement of the elements will be of your shot and vice versa. But you must adapt the interval to the real movement of the scenery.
For example with a sunset or sunrise, you know you’ll have 30 – 45 minutes to shoot the time lapse. To have enough photos to create your time lapse video of, use an interval of 3 – 5 seconds which results in making 360 – 900 photos in total. Read other suggestions for time lapse settings below.

Time lapse setting suggestions
The settings for your time lapse depend on the subject you are making a time lapse video from and what you want to create with the time lapse. But here is a formula you can use to determine the duration of the sequence.
(desired duration in seconds) x (frames per second for playback) = amount of frames for playback
You have to translate the total time into seconds with this formula.
(hours) x (60) x (60) = seconds
Below some suggestions for the interval per situation.
– People walking down the street: interval of 2 seconds.
– Clouds moving very fast: interval of 3 seconds.
– Sunset or sunrise: interval of 2 or 3 seconds.
– Clouds moving normally: interval of 5 seconds.
– Clouds moving very slowly: interval of 10 seconds.
– Night landscapes, stars, moon: interval of 20 to 30 seconds.
– Path of the sun on a clear day: interval of 30 seconds.
Another important thing to keep in mind is when you want to implement your time lapse into a video with edit software like Adobe Premiere Pro. You then need to calculate before how many photos you need to shoot depending on the recording frames per second of your video. Normally you will use 24-25 frames per second to record a video. So for example, if you want to use a 5 sec time lapse in a sequence of 25 fps then you need to take 125 photos (5sec x 25fps = 125 photos).
After you’ve made your time lapse photos you need to edit them to make a video of it. Read in this blog post how to edit your time lapse photos into a video with Adobe Premiere Pro.


Thanks for sharing so many facts about timelapse videos, very informative.